To add a finding directly in a module record, retrieve the record and click the Findings and Actions tab, then click New.
If you are viewing a suite’s list of findings (i.e. you clicked Findings & Actions in the suite menu (“Corrective Actions” in the Environmental menu), click New in the list.
You can create a finding and action from within an action plan (see Creating an Action Plan), or add an existing finding to an action plan (choose Actions»Add to Action Plan and select the plan).
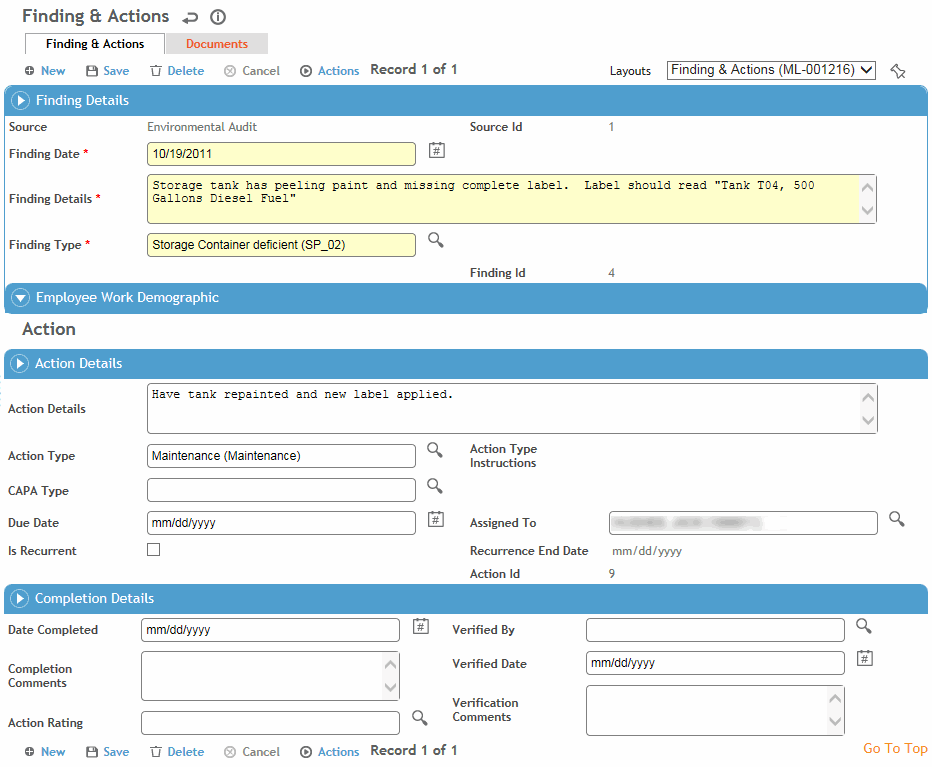
Change the Finding Date if necessary, enter the Finding Details, and select the Finding Type. Depending on the layout, you may also be able to record risk-related fields.
If this is an Environmental finding, indicate if the Finding resulted from deviation. If yes, a new event will be created with the event report type of “Environmental Deviation” (see Tracking Deviations).
Identify the Location of the finding, if relevant. If the finding was created from a module record, the demographics fields are taken from the parent record and are not editable unless you are using a custom layout that includes the Modify Finding Demographics check box.
Identify the Action required (Details and Type), who it has been assigned to, and the due date. The Action Type may be populated automatically if the selected Finding Type is defined with Related Actions in the FindingType look-up table.
Set the assignee and/or due date for multiple records at the same time: on the Findings list, select the records and choose Actions»Set Assignee/Due Date, then select the assignee and/or due date that will apply to all the selected records.
If the Assigned to Group field was added to a custom layout, you can assign the action to a group or team of employees (defined in the GroupandTeam look-up table) instead of to an individual in the Assigned To field. If the Complete as Team check box was added to the layout and selected, a single action is created for the group/team. If the check box is not selected, an action is created for each employee in the group/team.
If the action is a recurring action, select Is Recurrent. You are prompted to complete the recurrence settings (frequency and end date). If a Due Date was set for the action, that date becomes the recurrence frequency Start date (but you can change it.). New actions are created based on the due date of the original action plus the frequency.
To view existing recurrence settings, choose Actions»View Recurrence Settings.
To delete future recurrent actions, clear the Is Recurrent check box. You are prompted to confirm.
If you want to change recurrence settings, you must clear the check box to delete future actions, and then select the check box again and set the new recurrence settings.
If necessary, select an Escalation profile (from the TaskEscalation look-up table), which will automatically send a notification according to the due date. You may need to add this field to your layout.
Use the Documents tab to link an external file (e.g. an image) to a finding. Linking a file to a finding offers users easy access to the file (for more information, see Linking or Importing a Document).
The Notes tab allows you to record additional information that does not fit elsewhere in the form. For more information, see Adding Notes to a Form.
Click Save. You are prompted to send an email message notifying the person assigned to complete the action, or you can choose Actions»Email at a later time to send messages related to one or more finding. The email message includes a link to view their upcoming and overdue assigned actions in a standalone version of Cority (no menus, restricted functionality).
Automatic email notifications and reminders may be sent for actions according to the MAEN settings, if enabled (see Working with MAEN Settings). You can override the default settings for individual actions (e.g. to include an alternate employee, different frequencies, etc.). To do this, clone the applicable “Action (w/ Notification)” layout and use this layout when adding the action; be sure to select the Override MAEN Settings check box to override the default notification settings. If this check box is not selected, the default MAEN settings for the suite’s action type will be used.
These alternate layouts are included with Cority but marked as Inactive. They include a Notification section with all relevant MAEN fields. For more information, see Defining Form Layouts.
To identify another action required for this finding, choose Actions»Add New Action to Finding. If you want to repeat the same action for this finding but assigned to a different person, choose Actions»Copy Action.