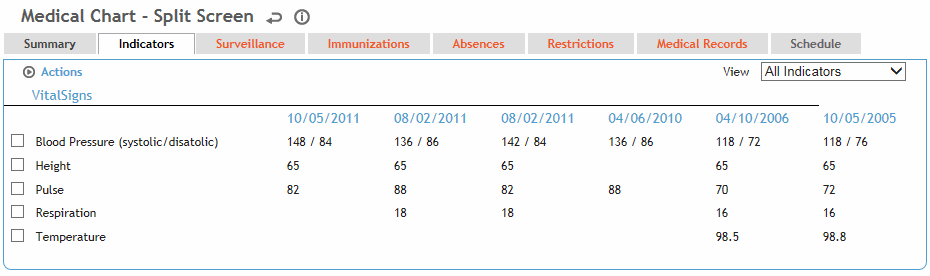
The Indicators tab allows you to monitor particular information for an employee, such as vital signs, clinical test results, and answers to particular questions.
To print a line graph and list of results for an indicator, select the check box beside the indicator and choose Actions»Generate Report/Graph.
To define the types of information you want to track, choose Actions»Edit Risk Indicators.
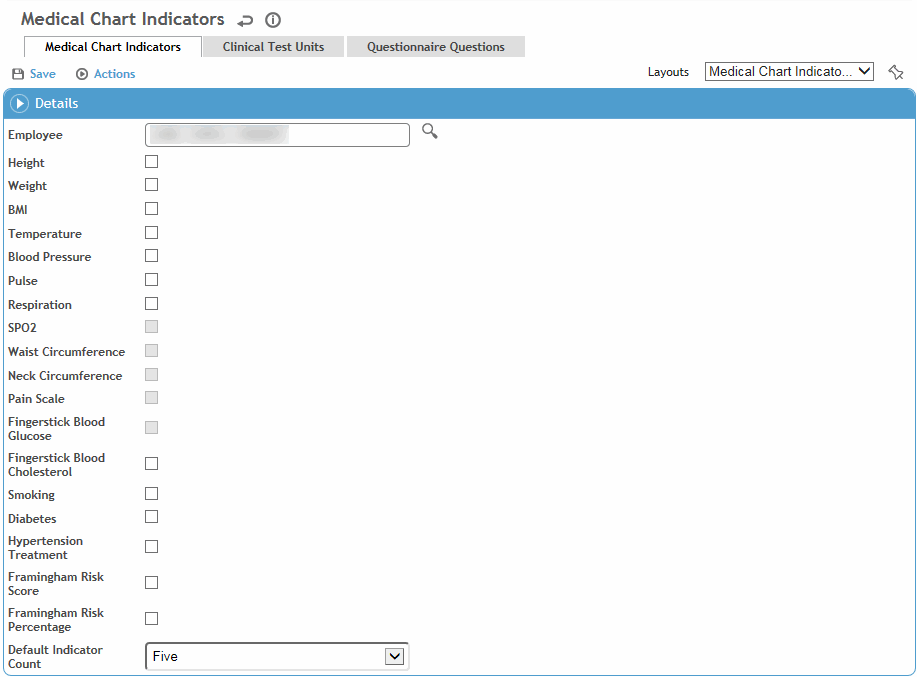
Some indicators may have been chosen by default by the administrator; you cannot remove these, but you can add others.
On the Medical Chart Indicators tab, select which vital signs you want to monitor. Only vital signs for which the Include in Vital Sign Report check box has been selected (in the Clinic Visit record, Vital Signs tab) are included.
Select the Default Indicator Count to identify the number of instances of each type that you want to view. For example, if you select 10, the form will display up to 10 instances of a result.
Units of measure (temperature, height, weight, neck) are set in the system settings; for more information, see Changing Your System Settings.
The Framingham Risk Score and Percentage indicators are only displayed if other functionality is enabled and all fields are completed in the Other Vitals section of the Clinic Visit record; contact your system administrator for more information.
If you want to monitor particular clinical test results, on the Clinical Test Units tab, click the “add” shortcut icon  (see Adding New Records) and select the test(s) that you want to monitor.
If you want to monitor answers to particular questions, on the Questionnaire Questions tab, click the “add” shortcut icon  (see Adding New Records) and select the question(s) that you want to monitor.
Any vital signs, tests, or questions that have the check box disabled are set as defaults in the system settings. For more information, see Changing Your System Settings.